Digital Fabrication Lab
San Diego Campus
The Digital Labs house a multitude of automated tools to perform both subtractive and additive manufacturing processes.
Laser Cutting
The mid-sized cutting systems are purposed for cutting and etching plastics, papers and fabrics. Laser cutters are commonly the first machine introduced to students and quickly become a strong companion to any design development. Continue to the Laser Cutters page for material recommendations, machine restrictions, a template file, and video guides.
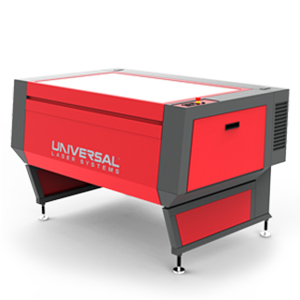
Universal 9
75 Watt Single CO2 Laser
Bed Size: 36″ x 24″
Laser Cutting Operation Details
For students in the Arch. or I. Arch. programs, the lasers are used for the quick production of working models and the creation of physical presentations. The Laser Cutting orientation provides instruction on how to use the machines but does not address the practice of translating 3D designs to flat material assemblies. We suggest seeking out and referring to packaging design, cut/scored folded paneling, and stacking and interlocking slices.
In the Arch. or I. Arch. programs, etching (explained below) is of little to no use as it is of a more graphic producing operation but occasionally is useful.
1. Completion of Laser Cutting orientation.
2. Proficiency in a 3D modeling.
Laser Cutters are able to perform three types of operations. Sheet material can be CUT, SCORED or ETCHED. The cutting or scoring operations fire the laser and move along a CAD vector drawing. In order to burn graphics into a material, an etching operation is performed.
CUTTING / SCORING
WOOD
Luan Ply (1/8″max)
Cork (1/8″max)
MDF (1/8″max) chars edge
PAPER
Card Stock
Museum Board
Micro Board
Cardboard (no double ply)
PLASTIC
Acrylic/Plexiglass (1/4″max) at slow speeds
Delrin
Mylar (no gold coating)
Styrene (0.04″max)
TEXTILE
Cloth
Felt
Hemp
Cotton
OTHER
Leather
Rubber
EVA Foam
Magnetic Sheet
ETCHING
All the above materials can be etched.
OTHER
Glass
Ceramic Tiles
Anodized Aluminum
Marble, Granite, Soapstone, Plaster
There are many materials that are unsafe to attempt to laser. The list below outlines the most important materials to avoid and why. If a student is unsure if a material can be laser cut, they should consult a Making Complex staff member.
BANNED
PVC -makes Chlorine gas
ABS -makes Cyanide gas
HDPE -melts and becomes gooey
Polystyrene Foam -flammable
Polyurethane Foam -flammable
Epoxy -makes Cyanide gas
Fiberglass / Carbon Fiber -makes Cyanide gas
Fiberglass / Carbon Fiber -makes Cyanide gas
Food -machine internals are not sterile
The following link will send you to our Tutorials page, where one can refresh themselves on the proper usage of any and all machines.
Tutorials
All users must check in with a staff member before starting their work session.
MUST CHECK IN PRIOR TO CUTTING
Students are allowed to make appointments to a maximum time of 1 hour per day and 3 hours per week. This system is on the honor system so do not take advantage of your classmates.
MAX APPOINTMENTS: 1 HOUR/DAY 3 HOURS/WEEK
At the end of one’s appointment, the machine must be stopped. The appointment schedule is not flexible so practice proper time management.
TRASH MUST BE REMOVED FROM MACHINE AND DISCARDED
Staff do not make cuts or clean up after students.
Proper machine setting for the user’s operation must be tested before running their actual job.
STAFF ARE NOT RESPONSIBLE FOR RECOMMENDING SETTINGS
Once the laser is cutting the user must stay with the machine and watch for a flame. If a flame is seen, report to a staff member.
USER MUST STAY WITH MACHINE UNTIL JOB IS COMPLETE
3D Printing
The lab also makes use of eight rapid prototyping machines for on-demand printing of models. They offer many different material options, from plastics to powders and ceramics. Continue to the 3D Printers page for material recommendations, machine restrictions, a template file, and video guides.
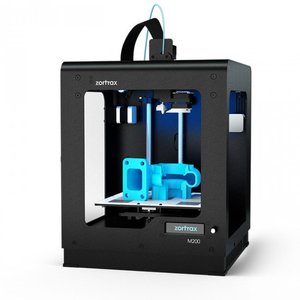
ZORTRAX M200
Material: ABS or PVA
Build Size: 7″ x 7″ x 6″
Support: break away
Colors: Black, White
Character: cheap but limited to simple geometry
Cost: $5 per cubic inch
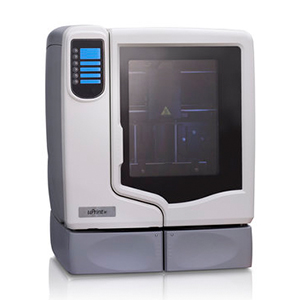
UPRINT SE+
Material: ABS Plastic
Build Size: 8″ x 8″ x 6″
Support: soluble PVA
Colors: Black, White
Character: very precise and soluble support but slow and expensive
Cost: $10 per cubic inch + $5 tray
3D Printing Operation Details
In the academic arena, 3D printers are used to quickly prototype parts or models with complex geometries. As a student, one will seek out the use of these machines when a project cannot be satisfied by quicker or cheaper means. Another use, as seen with the clay printer, is the investigation of such technologies and their implications to the field.
1. Completion of 3D Printing orientation.
2. Proficiency in a 3D modeling.
FILE PREPARATION
model scaling > wall thickening > closing geometry > converting to .STL
PRINTING FILE
prepare file > print and fill out form > make appointment > put into print queue > pickup print
The Making Complex offers digital file submissions for the 3D Printers and CNC Routers.
The following link will send you to our Tutorials page, where one can refresh themselves on the proper usage of any and all machines.
Tutorials
All students intending to 3D print must prepare their own geometry, fill out the submission form and make an appointment.
NO FILES WILL BE ACCEPTED WITHOUT AN APPOINTMENT AND FORM
It is the student’s responsibility to submit watertight and properly thickened models. The Making Complex takes no responsibility for failed prints due to geometry.
All submitted files are printed on a first come, first served basis. Once your consultation is complete your form is placed into a queue. When the print is complete, you will receive an email notifying you of its status.
PRINTS ARE RUN ON A FIRST COME, FIRST SERVED BASIS.
The Making Complex staff cannot guarantee that your print will be ready on a certain day/time.
If multiple files are submitted during the same consultation, yours will be run first, then the next person’s print will be run and then your second file will be run and so on.
To students needing to run multiple files on the UPrint SEplus, we advise you to print outside of the university. Refer to our Resources page for recommendations.
CNC Routing
Each campus has a large format 3 axis CNC router capable of processing plywood, plastics and foams. From cutting out flat shapes to assemblies and 3D surfacing of thick stocks. Continue to the CNC Routers page for material recommendations, machine restrictions, a template file, and video guides.
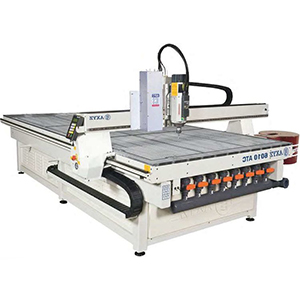
AXYZ 4896
Bed Size: 48″ x 96″ x 5″
Auto Tool Changer & Vacuum Bed
Capabilities: Profiling, Engraving and 3D sculpting
Cost: $15 per hour ($15 minimum)
CNC Operation Details
CNC routers have long been a digital tool used in the academic setting of design. The machine has the ability to quickly mock up full scale prototypes, make highly detailed site models and sculpt molds for casting parts. The learning curve is steep but once the nature of the process is understood, students find it incredibly useful.
1. Completion of CNC Router orientation.
2. Proficiency in a 3D modeling.
CNC Routers are used to cut out flat shapes (Profiling) such as gears and screens or making reliefs (2.5D sculpting) such as molds or topographies.
FILE PREPARATION
import scaled geometry into template file > sett proper layers > follow setup directions in the template file
RUNNING OPERATION
prepare file > print and fill out form > schedule and show up to consultation > schedule CNC appointment with staff member > bring material to appointment > clean CNC room
The Making Complex offers digital file submissions for the 3D Printers and CNC Routers.
Maximum material dimensions : 48″wide x 96″long” x 5″thick.
The amount of detail able to be achieved is dependent on tool size and time.
3 axis CNC routers are not able to machine “undercuts”. Refer to guide for details.
WOOD (DRY)
Plywood
MDF (formaldehyde free)
Softwood Lumber
Hardwood Lumber
FOAM (RIGID)
Styrofoam®
High Density Urethane
Precision Board®
Renshape®
Corafoam®
PLASTIC
Cast Acrylic
Sintra®
HDPE
ABS
METAL
Brass
Copper
Aluminum (sheet only)
OTHER
Corian®
Wax
Cork
The list below makes note of the most important materials to avoid. If a student is unsure if a material can be routed, they should consult a Making Complex staff member.
BANNED
Ferrous Metals (steel, stainless steel…)
Extruded Acrylic (plexiglass®)
Engineered woods with formaldehyde
The following link will send you to our Tutorials page, where one can refresh themselves on the proper usage of any and all machines.
Tutorials
All students intending to use the CNC router must follow the above process.
TEMPLATE FILE AND FORM MUST BE COMPLETE BEFORE CONSULTATION
Staff are not able to perform any of the setup steps for students.
Material brought to the appointment must be exactly what is indicated in the Template File.
Any tool not within our provided library must be purchased by the student.
After a work session is complete the student must clean the CNC room to perfection, even including any mess that is not from their job.
STUDENT MUST CLEAN THE ENTIRE CNC ROOM BEFORE LEAVING THE FACILITY.
Machine setup performed by staff begins at the start of your appointment and takes from 15 to 45 minutes depending on operation.